
Preparing for Tire Repair
Proper preparation is crucial to ensure safety and effectiveness when repairing a tire. Follow these key steps when preparing to use your Nealey Tire Repair Kit for tubeless tires.

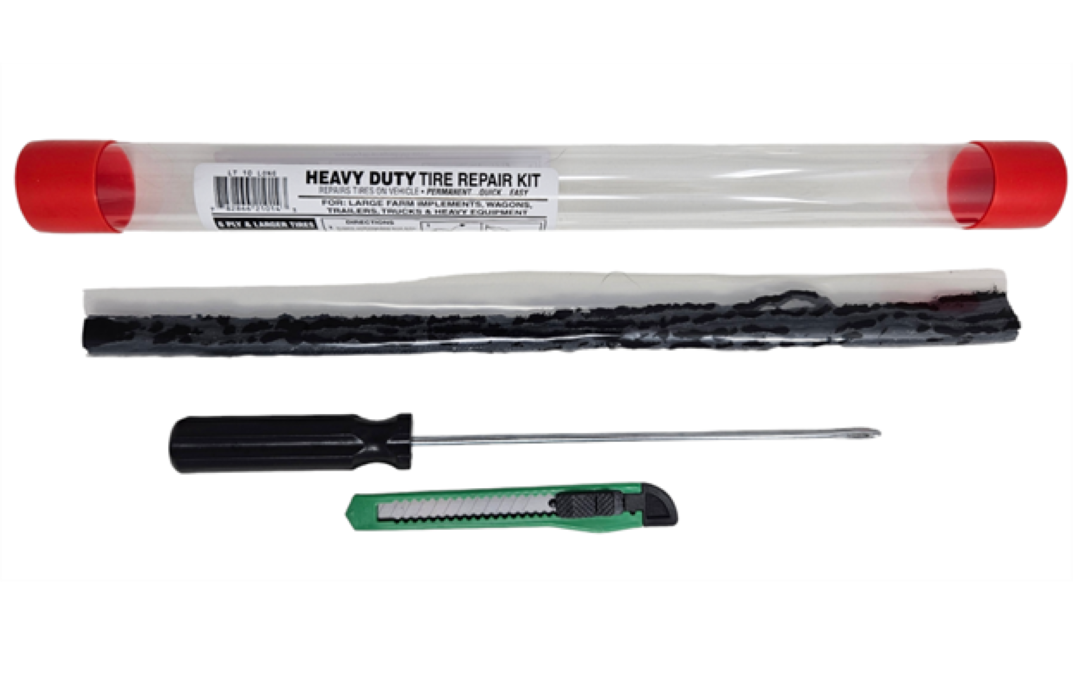
Don’t let flats get you down, be prepared with Americas most convenient tire plug- Nealey Tire Repairs
A. Safety First: Finding a Safe Location
- Choose a Secure Area: Park your vehicle on a flat, stable surface away from traffic.
- Use Safety Equipment: Engage your parking brake and, if available, use safety cones or hazard lights to alert others.
B. Inspecting the Tire
- Locate the Puncture: Inspect the tire carefully to find the puncture site. Look for any objects causing the puncture, like a nail or screw, that might still be embedded in the tire.
- Assess Repairability: Determine if the damage is fixable with a tire repair kit. If the puncture is on the sidewall or larger than ¼ inch, seek professional help.
C. Preparing the Tire for Repair
- Remove the Object: Carefully use pliers to remove any object lodged in the tire. Avoid enlarging the puncture during this process.
- Clean the Area: Remove debris around the puncture site to ensure the plug can adhere properly to the tire.
D. Additional Preparations
- Gather Your Tools: Have your Nealey Tire Repair Kit ready, along with any additional tools you might need, such as a tire pressure gauge or an air compressor for re-inflating the tire.
- Read the Instructions: Familiarize yourself with the instructions provided in your kit, as each kit might have specific guidelines to follow.
By following these preparatory steps, you ensure a successful and safe tire repair. Remember, proper initial assessment and setup are crucial before proceeding with the actual repair using the Nealey Tire Repair Kit.
Step-by-Step Guide to Using Your Nealey Tire Repair Kit
Using a Nealey Tire Repair Kit for tubeless tires involves a series of straightforward steps. Below is a guide to help you navigate the repair process effectively.
A. Cleaning the Puncture Area
- Identify the Puncture: Locate the puncture and clean the area around it.
- Use the Spiral Probe Tool: Insert the spiral probe tool from your Nealey kit into the hole. Rotate it to remove debris and roughen the inside for better adhesion.
B. Inserting the Repair Plug
- Prepare the Plug: Take one of the repair strands from your kit. These strands are pre-coated with sealing material, so no additional adhesive is needed.
- Insert the Plug: Thread the strand through the eye of the insertion tool. Push the tool and plug into the puncture, leaving about an inch of the plug on the outside. Turn the tool 1.5 times to create a knot, then pull the tool out, leaving the plug in place to seal the puncture.
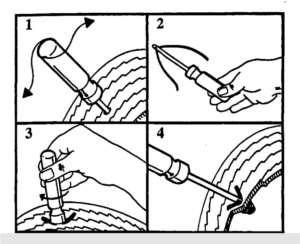
The above diagram shows how easy it is to use the Nealey Tire Repair Kit.
C. Cutting Off Excess Material
- Trim the Plug: Once the plug is securely in place, cut off any excess material protruding from the tire surface. This ensures a smooth surface and prevents further damage.
D. Re-Inflating the Tire
- Check Tire Pressure: Use a tire pressure gauge to check the air pressure in the tire.
- Inflate to Recommended Pressure: If the tire is under-inflated, use an air compressor to inflate it to the vehicle manufacturer’s recommended pressure.
E. Final Inspection
- Check for Leaks: Inspect the tire for air leaks by applying soapy water to the repaired area and watching for bubbles, which indicate a leak.
- Test Drive: If there are no leaks, take a short test drive to ensure the repair holds and the tire maintains pressure.
By following these steps, you can effectively use your Nealey Tire Repair Kit to address punctures in tubeless tires. Remember, while these kits are excellent for temporary repairs, it’s always wise to have a professional inspect the tire as soon as possible to ensure long-term safety and reliability.
Post-Repair Procedures with Nealey Kits
After repairing a tire with a Nealey Tire Repair Kit, it’s important to understand the longevity of the repair and the necessary maintenance to ensure ongoing safety and performance. Unlike many other temporary solutions, Nealey kits are designed to provide a permanent repair. Here are the key steps to follow post-repair:
A. Validating the Repair
- Check for Leaks: Even though Nealey repairs are permanent, initially checking for leaks is a good practice. Apply soapy water to the repaired area and watch for bubbles.
- Monitor Tire Pressure: Keep an eye on the tire’s air pressure after the repair. Moreover, a consistent pressure level is a good indicator of a successful repair.
B. Professional Validation
- Optional Professional Inspection: While Nealey repairs are intended to be permanent, if you have any doubts about the repair’s integrity, a professional inspection can provide peace of mind.
- Understanding the Repair Limitations: Be aware of the repair’s limitations. If the puncture is larger than what the kit is designed to handle, or if it’s located on the sidewall, seek professional advice.
C. Long-Term Tire Care
- Regular Maintenance: Continue with regular tire maintenance practices, such as rotation, alignment checks, and maintaining proper tire pressure.
- Visual Inspections: Periodically inspect the tire for wear and tear, paying close attention to the repaired area to ensure it remains intact.
D. When to Replace the Tire
- Assessing Tire Condition: Despite the effectiveness of a Nealey repair, regularly assess the overall condition of the tire. Consider factors like tread depth, age, and wear patterns.
- Consulting Professionals for Tire Replacement: If the tire shows signs of significant wear or if you experience any performance issues, consult with a tire professional for advice on replacement.
While Nealey Tire Repair Kits are designed to provide a permanent repair, adhering to these post-repair procedures ensures the continued safety and effectiveness of your tire. Therefore, regular monitoring and maintenance, along with professional consultations when necessary, are key to the longevity of your tire’s performance.